Friday, 25 April 2014
vanilla chiffon cake
Life hasn't been all that sweet lately. Literally. Just when I thought I had put the morning sickness behind me and started enjoying food again, I found out I had developed gestational diabetes. Devastating news, really, for someone who loves carbs. I was under strict orders to stay away from white bread, chocolate and desserts...basically all the good things worth living for. Seriously, if you thought dentists were evil, wait till you meet a dietician. At least we never tell our patients to lay off the sweets completely.
Needless to say, my kitchenaid has once again gone back into storage. Deprived of chocolate and my favourite past time, I think it was the first time I felt upset about being pregnant. (Morning sickness is a piece of cake compared to this.)

This chiffon was done back in happier times. It was my first attempt at a chiffon cake and I was a little disappointed that it didn't rise as much as I had expected. Eventually figured out it was because the sugar amount listed in the recipe was wrong which led to a wonky meringue. I've corrected it in the recipe below.

Please excuse the uneven bubble size. Like I said, this was my first attempt.

Vanilla Chiffon Cake
(adapted from Keiko Ishida's Okashi: Sweet Treats Made with Love)
Ingredients
80g top flour (sifted twice)
5 egg yolks
20g caster sugar
60g water
60g canola oil
seeds scraped from 1 vanilla bean or 1 tsp vanilla extract
(for the meringue)
90g caster sugar
10g corn flour
5 egg whites
Directions
- Preheat oven to 160°C.
- Beat egg yolks and sugar together in a mixing bowl.
- Add in water, canola oil and vanilla and continue mixing.
- Add flour and mix until well combined and batter is sticky. Set aside this egg yolk mixture.
- Combine sugar and corn flour in a bowl.
- In a separate mixing bowl fitted with whisk attachment, beat egg whites until foamy.
- Add half of the sugar-corn flour mixture and continue whisking for a few minutes.
- Add remaining sugar-corn flour mixture and whisk until glossy, stiff peaks are formed.
- Gently fold in 1/3 of meringue into egg yolk mixture first, then add in the remaining 2/3 meringue and fold to incorporate completely. Do this gently to avoid destroying the meringue bubbles.
- Pour batter into ungreased 21cm chiffon pan and bake in the oven for 40-50min.
- When cake is done, remove from oven and turn the pan over, leaving to cool on a wire rack upside down.
- Once cooled completely, run a knife or spatula around the edges to loosen the cake from the pan before inverting onto wire rack.
*I coated my chiffon cake with crème pâtissière because I love the stuff but you can opt to leave it out.

Thursday, 23 January 2014
mexican coffee buns
And we're back! What was supposed to be a short break from the kitchen to prepare for my wedding ended up getting extended by another 3 months thanks to an unexpected (but not unwelcome!) pregnancy. If you ask me, it should be called all-day sickness rather than morning sickness. I must have memorised my toilet bowl's every contour in those few weeks. The only thing that got me through was knowing that my suffering meant my baby's continued survival.
Well, thankfully, I've since reached the 2nd trimester and while I'm horrified to see my weighing scale flash numbers I've never seen before in all my life, I'm glad that the nausea has mostly abated and that I'm back to loving food again--particularly the sweet kind, to the dismay of my elf who jokingly predicted that our child is going to be born with dental caries. (As if it dares.) And so, in honour of my bun in the oven, I hauled out my dusty kitchenaid and activated my oven (the real one) to make these coffee buns.


We locals know them as Rotiboy/PappaRoti/MammaRoti, whichever is still in business currently. (I should probably call mine RotiGirl. hurhurhur.) I distinctly remember the first time I had one of these back in 2005. It was love at first bite, which is surprising for a non-coffee-lover. The recipe I used churned out buns that are more cinnamon-y than coffee-ish which I actually prefer. This is again surprising because I usually hate cinnamon. My little kicker apparently doesn't share my taste preferences.

Mexican Coffee Buns (makes 10 buns)
(adapted from Kitchen Corner)
Ingredients
(for the dough)
250g bread flour
38g caster sugar
3g salt
4g instant yeast
1/2 beaten egg
135g fresh milk
30g unsalted butter, softened
(for the filling)
140g salted butter, cold (cut into 10 cubes, each weighing 14g)
(for the topping)
50g unsalted butter, softened
40g icing sugar
38g beaten egg (slightly less than 1 egg)
1 tsp granulated coffee dissolved in 1 tsp of water (I used decaffeinated coffee)
1/4 tsp cinnamon powder
50g plain flour
Directions
- (for the topping)
- Beat the butter and the icing sugar until fluffy.
- Gradually add in the beaten egg, and then the coffee, mixing well in between.
- Add in the flour and cinnamon powder and mix until well combined.
- Place mixture in a small piping bag and refrigerate.
- (for the dough)
- In a mixing bowl fitted with a dough hook attachment, add the bread flour, sugar, salt, yeast, egg and milk and knead on slow speed.
- When ingredients are well-incorporated, add in the butter and continue mixing for about 30min until dough is smooth and elastic and not sticky.
- Divide the dough into 10 portions (by weight) and let it rest on a baking tray for 15min.
- Roll out each dough portion into a flat disc, place a cube of salted butter (the filling) in the centre. Seal it up tightly. (Make sure the edges of the dough are properly sealed otherwise the filling will ooze out, as some of mine did.)
- Place the filled dough balls back onto the baking tray, shaping them to be as round as possible, and spacing them at least 2-3inches apart Lightly cover with clingwrap and allow to rise for about 50-60min.
- Remove piping bag filled with topping from refrigerator. Snip off the end of the piping bag and pipe out the topping in a spiral pattern onto the dough. (As in the picture above.)
- Preheat oven to 200°C in the meantime.
- Bake buns for about 12-15min.
Tuesday, 9 July 2013
spinach and parmesan loaf
Wow it's been ages since I last logged onto blogger. Life's been a blur of late. So busy worrying about everything! Wedding preps, finding jobs, whether my teeth have moved too quickly and are now rootless... Well, one piece of good news is that I have finally paid off my bond and am now a free (wo)man! Which means I now have the power to decide my working hours! Which means that I have more time to bake! YEAH.
The downside is that the less you work, the less dough you roll in. Oh well. You can't have everything in life and right now I have decided I could do with a break. And some bread, since we're on the subject of dough.

This bread brings back fond memories of the time my elf and I first started dating. We were celebrating my birthday for the first time as a couple and the restaurant we went to served the most delicious spinach parmesan bread. I remember thinking I would love to try my hand at making some one day and so here I am, 8 years later, doing just that.

Started off by blending up some cooked spinach. I bought this stick blender/food processor for my sister as my dear niece has recently started taking tentative steps into the world of REAL FOOD (though in the pureed form, for now). I have a monster food processor which my elf gave me for Christmas but I was too lazy to bring it down from my room so I borrowed hers. I can't help marveling at a food processor in action the way most men marvel over the workings of a sports car (or a dyson vacuum cleaner). Is that sad?

Speaking of sad, I actually had to make this twice as the yeast I used in the first batch was inexplicably dead. Which is strange considering it was an unopened, unexpired packet that I had made sure to store in a cool, dry place. Ah, yeast. I have a love-hate relationship with the stuff.

looking less green in the glow of the golden hour
My version turned out slightly tougher and chewier than the original (at least from what I remember) but my elf really liked it. He says that's how real bread should be. (What?! Japanese soft fluffy milk bread rox4eva, hello?) That being said, it smelled heavenly and the flavour was great too. Pile on a slab of salted butter on a warm slice and I'm sold, tough and chewy or not.
Spinach Parmesan Loaf
Ingredients
100g spinach leaves (I used chinese spinach)
1 small onion, diced
2 tbsps vegetable oil
1/2 cup water
1/2 cup milk
1 egg
4 cups bread flour
1 tsp sugar
2 tsp salt
7g active dry yeast
150g grated parmesan cheese
1 tbsp of butter, melted
Directions
- Heat vegetable oil in a pan, add in the diced onion and sauté until golden brown.
- Add the spinach leaves and cook until tender.
- Place in a food processor and pulse until finely chopped (as in picture above).
- Leave to cool.
- In a mixing bowl fitted with dough hook attachment, add cooled chopped spinach, water, milk and egg.
- Add in bread flour.
- Create a small well in bread flour, add in yeast and bury it with the surrounding flour.
- Add sugar, salt and cheese.
- Knead on speed 2 for about 10-15min until dough is elastic and no longer sticky.
- Leave to proof in a bowl covered with a damp towel for about 2h or until doubled in volume
- Punch down dough on a floured working surface and shape into a sandwich loaf (or mini rolls if you prefer) and place in bread pan.
- Leave to rise until doubled in volume
- Preheat oven to 200°C.
- Brush the top of risen dough with melted butter
- Bake bread for about 20min or until crust turns golden brown and the loaf has a hollow sound when you tap it with a knife.
Thursday, 30 May 2013
salted caramel swiss roll
My taste buds have evolved quite a bit through the years but some things have withstood the test of time. Like my love for swiss rolls. All kinds really. Old school bakery type with the greasy buttercream, cheapo-but-still-decent Polar rolls, light-as-air but pricey Japanese ones... Give me a roll and I'll be swallowing it so fast my oesophagus will start to cramp--does that happen to you too?
My absolute favourite, though, has to be the ones from Rich & Good Cake Shop. I fondly recall the times we'd rush down from clinics in order to snag one (who am I kidding? 2, at the very least) of the limited rolls on sale at the hospital bazaar. It has always been my wish to recreate their swiss rolls but it just seemed like too daunting a feat.
Then I found Su-lyn's recipe.

I am my own worst critic and I usually don't think of the stuff I make as fantastic. But I have to say I was very pleased with this. It wasn't perfect (I tore a bit of the skin off while unrolling the cake and it's more oval than round) but it tasted almost as good as R&G's. Definitely way better than the old school bakery's and Polar's, at any rate. And the best part? It refrigerated really well! Usually cakes tend to dry out and harden when refrigerated but this was still light and fluffy after a night in the fridge.

Looks like a fleece blanket and has the texture of one too.
I filled mine with whipped cream and salted caramel because I am predictable like that. Had a panicky moment when I OD-ed on the (slightly under-whipped) whipped cream and the filling came oozing out like the blob from my childhood nightmares as I rolled up the cake. Explains the rather loose and flat roll. Well, our tummies were pleased even if my eyes weren't.

Strictly-speaking, the skin should be on the internal surface according to the recipe but I quite liked the golden-brown colour so I took the liberty of inverting it. Err... plus I made a crater when peeling off the foil but let's not talk about that. Either way, it's gonna end up in your stomach faster than your oesophagus can handle so have a cup of tea (preferably not scalding hot) at the ready.
Salted Caramel Swiss Roll
Roll Cake
This is the link to Su-lyn's roll cake recipe. Her instructions are so clear and concise I decided I can't make it any more comprehensive.
For the filling:
Salted Caramel
Ingredients
125g caster sugar
12.5ml water
75ml whipping cream
75g butter
Sea salt (to taste)
Instructions
- Put sugar and water in saucepan and heat gently, stirring until sugar dissolves.
- Raise the heat and, without stirring, wait until sugar caramelises and turns amber (watch closely and prepare to remove from heat once it turns golden as it burns quickly).
- Remove from heat and slowly pour in whipping cream, whisking well as you add the cream. (Be careful when adding the cream as it spits and hot caramel burns like hell.)
- Stir in the butter.
- Add sea salt as desired.
- Leave to cool.
Whipped cream
Ingredients
200ml whipping cream
Instructions
- Pour cream into a mixing bowl and using a whisk attachment, whisk until soft peaks form.
Friday, 22 March 2013
banana cupcakes with bailey's buttercream
One time my uncle decided to add a splash of Bailey's Irish Cream to the milkshake and it was so good I've come to associate Bailey's with bananas. Hence this recipe.


Banana Cupcakes with Bailey's Buttercream Frosting (makes ~12 cupcakes)
Banana Cupcakes
Ingredients
160g plain flour
110g caster sugar
2 tsp baking powder
½ tsp baking soda
¼ tsp salt
125g unsalted butter
3 eggs
½ tsp vanilla extract
3 small bananas or 2 large ones (the riper the better)
Directions
- Mash the bananas in a bowl and set aside.
- Preheat the oven to 175°C.
- Cream the butter and sugar until pale and fluffy.
- Add in the vanilla extract and mix well.
- Add in the flour, baking powder, baking soda, salt and eggs and mix until well-combined.
- Add in the mashed bananas and continue mixing.
- Fill cupcake liners with mixture until ~¾ full
- Bake for 15-20min until you can smell the cupcake aroma from the oven, the tops have turned golden brown, and toothpick inserted in centre comes out clean.
Bailey's Buttercream Frosting
Ingredients
2 egg whites
60g caster sugar
84g unsalted butter, softened
30-40ml Bailey's Irish Cream (or to your liking)
Directions
- Pour egg whites and sugar into a clean, heatproof bowl and heat over a saucepan of simmering water, whisking the egg and sugar constantly so it does not curdle.
- Continue whisking until mixture reaches 70°C.
- Remove from heat and transfer to a mixing bowl with whisk attachment
- Whisk until soft (not stiff yet), glossy peaks form and mixture has cooled to room temperature.
- Add in the Baileys a little bit at time, whisking well between additions.
- Change to paddle attachment, add in the butter and beat until it reaches frosting consistency. (Refer to this post for greater detail)
- Taste the buttercream--you can still add in more Bailey's if you wish.
- Frost as desired.
Additional:
I decorated my cupcakes by sprinkling some Banana Nut Crunch cereal (finely crushed), and topped it with a banana slice coated in honey.
Tuesday, 19 February 2013
(not quite) black forest cupcakes
For my Valentine's Day baking project I was hoping to do something a little edgier than the usual trite heart-shaped confections. Looked to the supermarket for some inspiration and was delighted to find cherries at the offer rack. [Truth be told, I spend more time at the supermarket than any other retail outlet. Which is a bit sad for a woman who is not yet married with children.] I love my stone fruits and cherries are tied for first place favourite with peaches. Cherries in their natural form, that is. I cannot stand maraschino cherries. Or indeed, any type of "cherry"-flavoured foods, which I automatically associate with cough syrup.
But I digress.

The original intention was to do a Black Forest cupcake inspired by the excellent BFG (Black Forest Gateaux) we had at the Fat Duck which I still dream about from time to time. Sadly, I didn't manage to find kirsch so I substituted it with rum, which apparently is commonly used in the Austrian version. Brandy might have been a better alternative but I was rather reluctant to use the Cognac at home.
I also switched the whipped cream for a cherry-rum-infused cream cheese frosting as the cherries I used were rather sweet and I wanted something tart to complement the richness of the chocolate cake.

So yes. There you have it! My Valentine's Day project which my valentine was rather pleased with.

(Not quite) Black Forest Cupcakes (makes ~24 cupcakes)
A. Cherry Filling
Ingredients
12 cherries, pitted and halved
1 cup rum (or just enough to soak the halved cherries in)
Directions
- Place the cherries in a bowl and pour in the rum, making sure that the cherries are immersed.
- Leave to soak for at least 3h.
B. Chocolate Cupcake
Ingredients
1¾ cup plain flour
1½ cup caster sugar
¾ cup cocoa powder
1½ tsp baking soda
1 tsp baking powder
1 tsp salt
2 eggs
1 cup buttermilk
1/2 cup vegetable oil
1 tsp vanilla extract
1 cup strong black coffee (steaming hot)
Directions
- Place flour, sugar, cocoa powder, baking soda, baking power and salt into a mixing bowl.
- Add in eggs, buttermilk, oil, vanilla extract and coffee.
- Mix well using paddle attachment.
- Preheat oven to 175°C.
- Fill cupcake liners with batter until ¾ full.
- Bake for ~18min or until skewer inserted in centre comes out clean.
- Leave to cool on wire rack
- When cool, use a sharp knife to core out centres of all the cupcakes. Do not discard the 'lid'.
- Stuff in a rum-soaked cherry half and ¼ tsp of cherry-rum (from A.) into each cupcake and replace cored out cupcake lid
C. Cherry-Rum-Infused Cream Cheese Frosting
Ingredients
240g cream cheese, softened at room temperature
120g unsalted butter, softened at room temperature
~1 cup confectioner's sugar (This is arbitrary. You can adjust the amount according to your preference for frosting sweetness.)
2 tbsp of cherry-rum (from A.)
Directions
- Mix cream cheese and butter together until well-combined.
- Add in sugar ¼ cup at a time until desired sweetness level is achieved
- Add in cherry rum and continue mixing until fully incorporated.
- Frost as desired!
Monday, 18 February 2013
pineapple jam
We are about a week into the Lunar New Year and as tradition dictates, I am down with the flu. There's something about the frenzied activities that just kills your body. Or it could the daily gathering of lots of people in confined spaces that facilitates the spread of germs. Or it could be the "heatiness" from all the LNY goodies, as the older generation would say.
LNY is a time for feasting. Snacks are practically shoved in our faces whenever we enter someone's home (which is rather often, if you've got a big family like mine) with the end result being a lot of grumbling from people about burgeoning waistlines. I generally don't have a problem with weight gain during LNY. Not because I am secretly dieting like most people believe, but because I am just not very fond of LNY snacks. The only exception being Mrs Lim's pineapple tarts. (Mrs Lim is the mother of my binge buddy. How appropriate.)
Having been fortunate enough to get my hands on the recipe a few years back, I've been religiously making my own tarts every LNY. My family and future in-laws love the tarts so much, I have to make 4 large batches to keep everyone happy.

I prefer making the closed kind of pineapple tarts because it has a more favourable pastry to jam ratio for me. But then again, this can vary according to how thin you roll our your pastry and how big a dollop of jam you use. There was one year we tried these closed tarts at my grandparents' which had such an appalling amount of filling we couldn't bring ourselves to finish the thing. "Pineapple bomb", my cousin called it. I suppose it wouldn't have tasted that bad if the pineapple wasn't candied to the extent that it was.

For the past few years, I've been using the store-bought pineapple paste to make my tarts. They work well enough but I've always wanted to try my hand at making my own jam so my tarts would be 100% home-made. So that's what I did this year! And now I can't go back to using store-bought pineapple paste. As my elf puts it: "You don't know what you're missing until you've tried pineapple tarts made with home-made pineapple jam." They make you realise that store-bought pastes just don't taste of pineapple.

Pineapple Jam
(adapted from Table for 2... or more)
Ingredients
2 large pineapples* (mine were about 1.2kg each, 600g after peeling)
[opt: 20ml water (if your pineapples are juicy you can leave this out)]
1¼ cup sugar
1 small cinnamon stick
*note: the sour, fibrous variety of pineapples is preferred.
Directions
Cut out the core of the pineapple, chop it up and and place it in a blender.
Blend until you get a fine puree.
Chop up the rest of the peeled pineapple and place the chunks (and any juice) into a blender.
If your pineapples are not very juicy, add 20ml of water.
Blend to a fine consistency while still maintaining a bit of chunkiness.
Place in a wok or heavy-based pan together with the cinnamon stick, and reduce over medium heat until at least 80% of its fluid content has evaporated.
Add in the sugar. (This will cause the mixture to turn watery again.)
Continue cooking, stirring occasionally, until the mixture thickens to a paste.
Increase to high heat and cook until desired colour is achieved.
Remove from wok/pan and leave to cool, which will cause the jam to thicken further.
If the mixture is still too wet, you can either return it to the wok/pan to continue cooking, or strain the syrup out.
**Sorry I can't disclose the recipe for the pineapple tart pastry without permission from Mrs Lim.
Tuesday, 29 January 2013
chocolate truffle swirl cookies
Been feeling rather uninspired and lacklustre of late, which unfortunately has translated into increasingly poor photography. Hopefully I'll snap out of it soon.
In other news, I have been wanting to try out this chocolate chip cookie recipe since I first chanced upon Kathryn's blog. I've been in awe of Heston Blumenthal since watching the first episode of Heston's Feasts. And having been fortunate enough to snag a table at The Fat Duck last June, I'm thoroughly convinced the man is a genius. While I'll definitely never be able to recreate his amazing dishes, this chocolate chip cookie recipe seemed manageable enough. (Though I'm sure his end-result looked and tasted a million times better.)

Technically it's a chocolate chip cookie made with bits of chocolate truffle. Unfortunately, mine turned out to be chocolate swirls rather than chips, hence the re-christening. I guess I should have anticipated the weather might be an issue and chilled the ganache for longer.

The last time I baked cookies was about 2 years(?!) ago so I had some difficulty gauging the doneness. Baked these in 3 batches and every batch turned out different. While you can't possibly use the skewer method like for cupcakes, I've learnt that, like cupcakes, you can tell they are done by the sudden burst of aroma issuing forth from the oven. Pretty intriguing stuff.

When baked evenly through (i.e. golden brown), these cookies are nice and crisp. Kind of like the Famous Amos sort. I preferred my cookie to be slightly undercooked (i.e. a little pale in the middle), such that it's crisp around the edges but soft and chewy in the middle. I liked that the little swirls of truffle gave the cookies a pleasant hint of bitterness (I used 70% dark chocolate).

Chocolate Truffle Swirl Cookies -- makes ~35 (6cm-diameter) cookies
(adapted from Kathryn's Heston's Chocolate Chip Cookies)
Chocolate Truffles:
Ingredients
10g light corn syrup
70g whipping cream
65g dark chocolate (I used 70% cocoa)
pinch of salt
Directions
- Place chocolate in a heatproof bowl and melt over a saucepan of simmering water. Set aside.
- In a separate saucepan, pour in whipping cream and corn syrup and bring to a boil.
- Take off the heat, add salt, and pour cream mixture into the melted chocolate, 1/3 at a time, stirring well.
- Leave to cool to room temperature then pour onto a tray/baking sheet lined with baking paper
- Freeze for 4h (or overnight if you're from my sunny island).
- Remove from freezer and and cut into small pieces. Put back into the freezer until required.
Cookies:
Ingredients
220g plain flour, sifted
¼ tsp baking soda
½ tsp baking powder
5g salt
¼ tsp instant coffee
115g unsalted butter, cubed and kept cold
250g caster sugar
1 egg
1 vanilla pod (scrape out the seeds and discard the pod)
Directions
- Preheat oven to 190˚C.
- Using a whisk attachment, cream together butter and sugar until pale and fluffy.
- Add in the egg and vanilla seeds and continue whisking
- Change to paddle attachment, add in the flour, baking soda, baking powder, salt and coffee and mix well.
- Gently stir in the frozen chocolate chips with a spatula/wooden spoon until well distributed.
- Using a melon ball scoop, place small balls of dough onto a baking tray lined with baking paper. The balls of dough should be spaced well apart (leave a radius of at least twice the diameter of the dough).
- Bake for about 15min until edges are golden brown (or until all the pale cookie bits turn golden brown, if you like them more cooked)
- Leave to cool on the baking tray. The cookies should start to harden as they cool.
Thursday, 10 January 2013
spicy red pepper bread
Sometime during the festive week we finally went on a picnic. I say finally because we had actually been intending to go on one approximately 9 months ago and had been constantly postponing it because, well, the weather here just makes staying indoors a much better option. But the temperature cooled considerably with the December rain so we filled up the lovely picnic basket he bought 9 months ago, and went in search of a nice patch of grass to set up camp.
I don't know about you, but at every picnic I've been to, we usually end up with a huge amount of leftover food. Thankfully, this time round our calculations weren't too far off and we only ended up leaving with an unopened bag of chips and a small tub of spicy red pepper dip. We bought the dip from the supermarket and it tasted pretty good so I was quite reluctant to see that go to waste. The elf mentioned that it would taste superb on bread and I thought, "why not put it in bread?"

So that's what I did! Naturally, I used the Japanese milk bread tangzhong method again, having been so impressed with the results. To be honest, I don't think I can go back to making bread any other way. Perhaps one day when my palate and masticatory muscles have developed well enough for me to start appreciating the tough, chewy, funky-looking kind of bread so highly favoured by my parents.

The thing about using pastes which you don't make yourself is that you have no idea what went in it. I got a bit nervous when my dough turn a lurid orange hue and even more so when it did not seem capable of rising. I was fervently hoping it was due to the lower ambient temperature brought about by the torrential downpour that started just as I was about to proof the dough, and not some secret antifungal in the dip that killed my yeast. Come to think of it, the same thing happened the last time I made my olive herb loaf. I assume it must be the rain because that's the only common variable? So after the skies cleared I quickly brought my dough out to sunbathe and it eventually rose. Lesson learnt: avoid baking bread during the monsoon season.

The bread is sufficiently tasty on its own but I prefer to eat it warm--either fresh from the oven or toasted--and with a generous chunk of salted butter.
Spicy Red Pepper Bread (makes two 21cm x 11cm x 5.5cm loaves)
Ingredients
295g bread flour
40g caster sugar
4g salt
5g full cream milk powder
6g instant dried yeast
1 tsp garlic powder
1 egg beaten (and 1 more egg, for eggwash)
30g whipping cream
27g milk
92g tangzhong (instructions here)
25g melted salted butter (cooled to room temperature)
100g spicy red pepper dip (I bought mine from Cold Storage's deli section)
Directions
The bread is sufficiently tasty on its own but I prefer to eat it warm--either fresh from the oven or toasted--and with a generous chunk of salted butter.
Spicy Red Pepper Bread (makes two 21cm x 11cm x 5.5cm loaves)
Ingredients
295g bread flour
40g caster sugar
4g salt
5g full cream milk powder
6g instant dried yeast
1 tsp garlic powder
1 egg beaten (and 1 more egg, for eggwash)
30g whipping cream
27g milk
92g tangzhong (instructions here)
25g melted salted butter (cooled to room temperature)
100g spicy red pepper dip (I bought mine from Cold Storage's deli section)
Directions
- Add bread flour, sugar, salt, milk powder, yeast and garlic powder into mixing bowl.
- Pour in the egg, whipping cream, milk and tangzhong.
- Knead using a dough hook attachment on speed 2.
- When ingredients start to come together, add the melted butter.
- Add in the spicy red pepper dip and continue kneading for ~20min until dough is smooth and elastic. (You can add more flour if the dough appears too wet. This varies according to the consistency of the dip you use.)
- Place a damp towel over the mixing bowl and leave to proof in a warm place until dough doubles in volume (mine took about 1h).
- Transfer dough to a clean, floured surface and punch it down.
- Divide dough into portions weighing ~70g.
- Shape it as instructed here.
- Leave to proof again.
- Preheat oven to 180˚C.
- Brush tops of risen dough with eggwash.
- Bake for ~20min or until golden brown.
Friday, 28 December 2012
swiss meringue buttercream
Been so busy baking for our charity project I haven't had time to update this space! I actually have loads of recipes lined up, waiting to be tested, but until I find the time to carry out my ambitious plans, we'll just have to make do with this basic Swiss Meringue Buttercream (SMBC) recipe.

2 factors I like about SMBC are its stability and its versatility. I've tried the standard buttercream before but it was just too unstable in our sweltering heat. SMBC tends to hold up a bit better, which is a blessing when you've got a staggering number of cupcakes to frost and deliver. Plus, it's so easy to flavour! You can add in chocolate, fruit purees or salted caramel like I did--the possibilities are endless, really.
The thing to take note while making SMBC is that during the mixing stage, the mixture goes through different phases. It starts out looking watery and 'soupy', then it turns into a curdled-looking mess (that got me panicky the first time I made it), and eventually it morphs into a thick, luscious, smooth buttercream. Despite having made the stuff many times in the past month, witnessing this transition never fails to amaze me.
Other important things I've learnt:
1. ALWAYS use fresh eggs. In addition to giving you peace of mind (and GI tract), fresh eggs are easier to separate.
2. When making the meringue, some recipes indicate heating the egg white-sugar mixture to a temperature of 140-150˚F. While I've tried 140˚F before and escaped unscathed, the recommended minimum cooking temperature for eggs is actually 160˚F (or ~71˚C) so you might want to go with that instead.

Ingredients
4 egg whites
120g caster sugar
168g unsalted butter, softened
Directions
- Pour egg whites and sugar into a clean, heatproof bowl
- Heat egg white + sugar over a saucepan of simmering water, whisking constantly, until the mixture reaches 71˚C. I use a digital probe thermometer to check.
- Transfer to mixing bowl fitted with whisk attachment
- Whisk until stiff peaks form and meringue cools to room temperature
- Switch to paddle attachment and add in the butter
- Mix until thick, smooth buttercream is formed
- Add flavouring as desired (for chocolate buttercream, I add about 100g melted good quality dark chocolate)
- Frost cupcakes/cakes!
Monday, 10 December 2012
berry tart
When I visited the UK a few months back, I was delighted to find strawberries and blueberries going for about £1 a punnet. It was my first purchase upon touching down on English soil and they tasted absolutely amazing after starving for 14h on the plane. Sadly, the berries we get here in Singapore are not only hideously expensive but are often horribly sour/tasteless. I try to avoid buying them unless they're on sale at the supermarket.

I was planning to make a mixed berry tart with strawberries, blueberries, blackberries and raspberries but the eye-popping price tags on the berries made me decide on a 2-berry tart instead. Might have gone with a plain blueberry (my favourite berry!) tart if weren't for the irresistible lure of the strawberries' vibrant hue. Just seeing all the bright colours in this post makes me so happy.

The blueberries were surprisingly sweet and the strawberries weren't too bad either. Sadly, I think I'd overworked my pastry this time round so it was a bit tough intially. But a night in the fridge helped it to soak up a bit of moisture from the crème pâtissière and it was just right when we ate it the next day. As you can see from the photos, I went a bit overboard with the crème pâtissière on the larger tart but it was soooo good I couldn't resist flooding the tart with it. Can you tell it's my favourite thing at the moment?

I got the recipe for the pâte sucrée from Michel Roux's Pastry: Savoury of Sweet. I strongly encourage you to get the book if you haven't already done so. It's well worth the money! (Not that you have to fork out all that much for it anyway.)
For the filling I used a mixture of whipped cream and crème pâtissière. I did some guesstimation when it came to proportions so I can't give you the exact measurements but it's approximately a 1:1 ratio in weight.
Sorry for the sketchy recipe this time round! That's the problem with leaving it too late to blog a recipe (and failing to record it down in the first place)--you forget everything! I'll be sure to update this post the next time the berries go on sale at the supermarket.
Saturday, 24 November 2012
profiterole part 2: filling up on crème pâtissière
Finally got down to making some crème pâtissière last weekend so we are good to go with this post!
Ok, so you've got the perfect choux buns, but what's the point if you haven't got some luscious filling to stuff it with? There are many options when it comes to stuffing a profiterole. You can use run-of-the-mill whipped cream, ice cream, chantilly cream, or crème pâtissière (aka pastry cream). You can even opt to branch out into flavours aside from the traditional vanilla. The last time I made choux pastry, we had an appalling amount of durians waiting to be used so I made a batch of durian puffs. My elf says we no longer need to buy them from Goodwood Park Hotel. (But that's for another post, perhaps when the durians come flooding in again.)
I find a combination of chantilly cream and crème pâtissière works best for my profiteroles. Crème pâtissière can be a little bit heavy so combining the two results in a more desirable consistency. The resulting mixture was so good we piled it on top a bunch of strawberries and polished off the punnet. (Better than the strawberries & cream at Wimbledon, in my opinion.)
There are various methods to filling a profiterole, depending on the type of filling you choose. If you're going with a stiffer filling like ice cream, you can section the choux bun transverely (like a hamburger bun), pipe or scoop the filling onto the bottom half, and then top it with the choux lid. If your filling is of a thinner consistency, you can use my method which is to pour the cream into a squeeze bottle, poke a hole in the bottom of the choux bun and slowly squeeze the filling in. Be careful, though. The pastry is rather delicate so using too much force or overfilling can result in unwanted extrusion at the other end. (Like a badly done root canal. Sorry I couldn't resist.)

Crème pâtissière -- makes ~370g
Ingredients
3 egg yolks
60g caster sugar
20g plain flour
250ml milk
1 vanilla pod, split longitudinally
Directions
- Whisk egg yolks and ⅓ of the sugar together in a bowl to a light ribbon consistency
- Whisk in the flour
- Pour the milk into a saucepan and add the vanilla pod (and the seeds scraped out from the pod)
- Heat the vanilla-milk until it comes to a boil, then pour the milk into the egg yolk mixture, stirring as you go.
- Transfer the mixture back into the saucepan and bring it to a boil over a medium heat, stirring continuously with a whisk until mixture starts to thicken.
- Pour into a bowl and place a clingwrap film on the surface of the mixture to prevent a skin from forming
- Leave to cool to room temperature then chill in the fridge for ~1h
Chantilly Cream -- makes ~250g
Ingredients
200ml whipping cream, chilled
10g icing sugar
pinch of vanilla powder or ½ tsp vanilla extract
Directions
- Pour the chilled whipping cream, icing sugar and vanilla into a mixing bowl fitted with a whisk attachment and whisk until soft peaks form.
**Assembly
- Gently fold the crème pâtissière into the chantilly cream with a spatula until combined.
- Fill a squeeze bottle (or piping bag with small round nozzle) with the cream mixture
- Poke a hole in the base of the choux puff with a toothpick/skewer
- Fill puff with desired amount of cream
- Coat the top of the choux puffs with ganache (optional)
Friday, 26 October 2012
lemon & maple syrup cupcakes
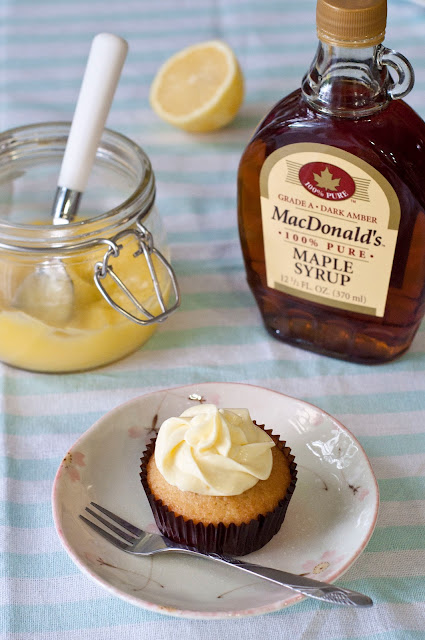
Next step was trying to figure out how to incorporate it into a cupcake. Lemon and maple syrup frosting on a butter cupcake base would have been the obvious choice. But I had been wanting to try out Glory's Perfect Vanilla Cupcake recipe for the longest time so I chose to omit the butter component and play up the lemon and maple syrup parts more.

So vanilla cupcake + lemon and maple syrup frosting then? I wasn't entirely satisfied with that. I wanted something less...predictable. And so we threw in a surprise lemon curd centre!
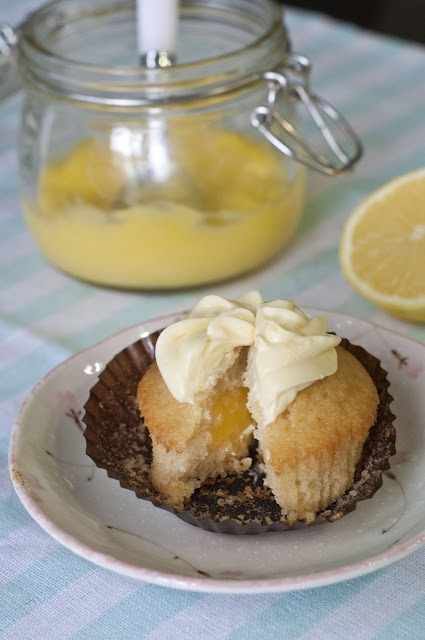
Final product: vanilla cupcake with a lemon curd centre, topped with a lemon-maple syrup cream cheese frosting, served with a drizzle of maple syrup.
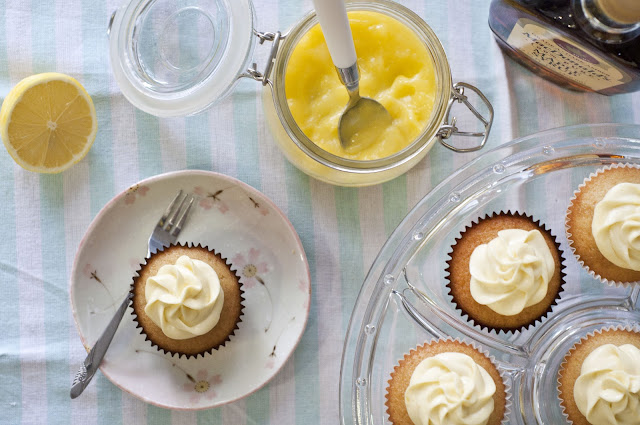
Lemon & Maple Syrup Cupcakes
(yields ~ 16 cupcakes)
Vanilla Cupcake Recipe
Ingredients
1¼ cup cake flour
1¼ tsp baking powder
½ tsp baking soda
½ tsp salt
2 eggs
¾ cup sugar
1½ tsp pure vanilla extract
½ cup vegetable oil
½ cup buttermilk
Directions
- Preheat oven to 175 deg Celsius
- In a bowl, add cake flour, baking powder, baking soda and salt. Stir the dry ingredients together and set aside
- In a mixing bowl, beat eggs for ~10-20s. Add in the sugar and continue to beat for 30s on medium speed.
- Add in vanilla extract and oil and beat again.
- Add in half the dry ingredient mixture and mix together on low speed
- Add half of the buttermilk, then rest of the flour, followed by rest of the buttermilk, mixing well in between each addition
- Line muffin pan with cupcake liners and pour batter into liners until ~⅔ full
- Bake in oven for ~15min or until toothpick inserted in centre comes out clean.
Lemon Curd
(adapted from Valli Little's recipe on taste.com.au)
(Note: There will be quite a bit left after filling the cupcakes. You can use the rest on pancakes, toast, biscuits, as a tart filling, in crepes and so on.)
Ingredients
1 egg + 1 egg yolk
82g caster sugar
40g unsalted butter
zest and juice of 1 lemon
Directions
- In a saucepan, whisk together the egg, egg yolk and sugar until smooth.
- Place pan over a low heat
- Add the butter, lemon juice and lemon zest, whisking continuously until mixture thickens
- Remove from heat, pour into a jar and leave to cool
Lemon-Maple Syrup Cream Cheese Frosting
(adapted from Lemon Cream Cheese Frosting recipe on allrecipes.com)
Ingredients
150g cream cheese, softened
40g unsalted butter
20ml lemon juice
1 tsp lemon zest
¾ tsp vanilla extract
1 tbsp maple syrup
¾ cup confectioner's sugar (this is subjective, you can add more/less depending on your preferred level of sweetness)
Directions
- In a mixing bowl, beat cream cheese, butter, lemon juice, lemon zest, maple syrup and vanilla together until smooth and fluffy
- Add the sugar gradually, tasting in between additions until desired level of sweetness is attained.
*Assembly
- Use a sharp paring knife to core out the centre of the cupcake, taking care to leave a little bit of cake at the base.
- Cut the core in half (in a transverse direction), leaving the upper segment as a lid and discarding the other segment (or you can eat it!)
- Add a tsp of lemon curd into the hole you just made and fit back the upper part of the cupcake core (or the lid) to close the hole
- Pipe frosting as desired
- Drizzle maple syrup over the frosted cupcake before serving
Tuesday, 16 October 2012
olive herb bread
I haven't really had time to do my weekly baking lately, what with Saturday duties and wedding preparations getting in the way, so Profiterole Part II is still work in progress! Thankfully I've got a few unblogged recipes to fill the gap in the meantime.
First up is a bread recipe! Have I mentioned how much I prefer baking bread to anything else? It's so much quicker and cleaner! As opposed to desserts where you have to wash your mixing bowl multiple times (depending on how many components you have), not to mention the frosting paraphernalia like nozzles and couplers which are such a pain to clean (thank goodness for interdental brushes!) And everything is just so greasy that I find myself constantly depleting the detergent supply. Bread, on the other hand, is a single component so you only have to use the mixing bowl once (or not at all if you knead by hand) and the flour soaks up all the butter/oil so it's much less greasy.
Anyway, having been so thoroughly satisfied with the Japanese Milk Bread using the tangzhong method, I decided to use it as a base for my herb bread. I was a bit worried initially because my dough didn't seem to want to rise. Had to wait much longer before expansion became evident. Perhaps it was because I did this on a cold, rainy day and my little yeast friends were feeling a bit lethargic? Whatever the case, they eventually rose to the occasion (hurhurhur) and a beautiful tasty loaf was born.
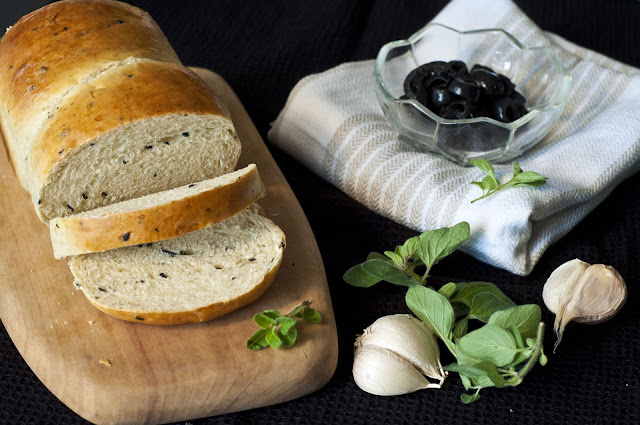
Creamy scrambled eggs piled on top of slice of this makes for a perfect weekend breakfast, in my opinion. Or you could eat it plain, which was how we phagocytosed half the loaf after it came out of the oven.

Olive Herb Bread
(base Hokkaido Milk Loaf recipe obtained from Christine's Recipe)
Ingredients
270g + 25g bread flour
43g caster sugar
4g salt
4.5g full cream milk powder
5.5g instant dried yeast
125ml water
1 egg, beaten (and 1 more egg for the eggwash)
30g whipping cream
27g milk
25g salted butter, melted and cooled to room
temperature
¼ cup chopped black olives
1 tsp dried oregano
1 ½ tsp garlic powder
Directions
- In a saucepan dissolve 25g bread flour in 125ml water
- Cook in medium-low heat, stirring constantly with whisk, until mixture starts to thicken and forms streaks when stirred.
- Pour thickened mixture (or tangzhong) into bowl
- Place clingwrap film over tangzhong (film should be sticking to tangzhong to prevent surface from drying up) and leave to cool to room temperature
- In a mixing bowl add 270g bread flour, sugar, salt, milk powder, oregano, garlic powder and yeast
- Add in egg, whipped cream, milk and 92g of tangzhong
- Mix using dough hook attachment on speed 2
- When ingredients start to come together, add melted butter and chopped black olives (picture 1)
- Continue to mix until dough is smooth and elastic (about 20min)
- Leave to proof for about 40min or until dough doubles in volume (picture 3)
- Transfer dough to a clean, floured surface and punch it down
- Divide dough into portions weighing about 70g
- Roll it out into a flattened circle and fold (as in picture 4)
- With seal upwards, roll into a cylinder (as in picture 5)
- Place in a bread pan and leave to rise (picture 6)
- Preheat oven to 180 deg Celsius
- Brush tops of risen dough with eggwash
- Bake for 30min or until golden brown
Subscribe to:
Posts (Atom)